
The reusable content element can be used when you want to share the same content on multiple pages of your website. With the reusable content, you will need to update the content only once, and it will be automatically updated on all pages.
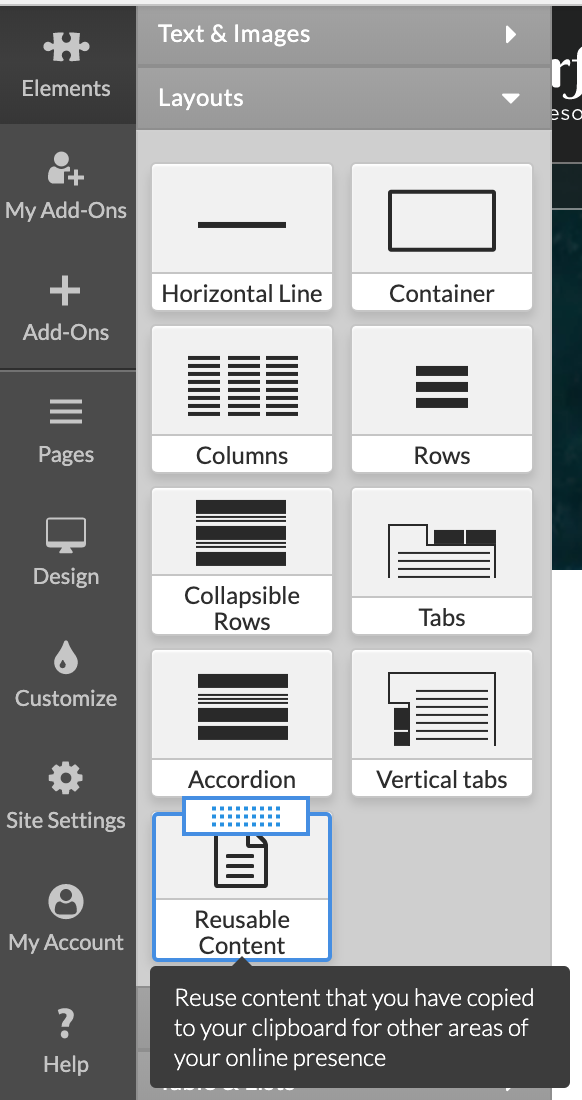
To add reusable content, click Elements, click Layouts, click Reusable Content and drag-and-drop the element on a page. Blue rectangles will appear to indicate the locations where a form may be dropped.
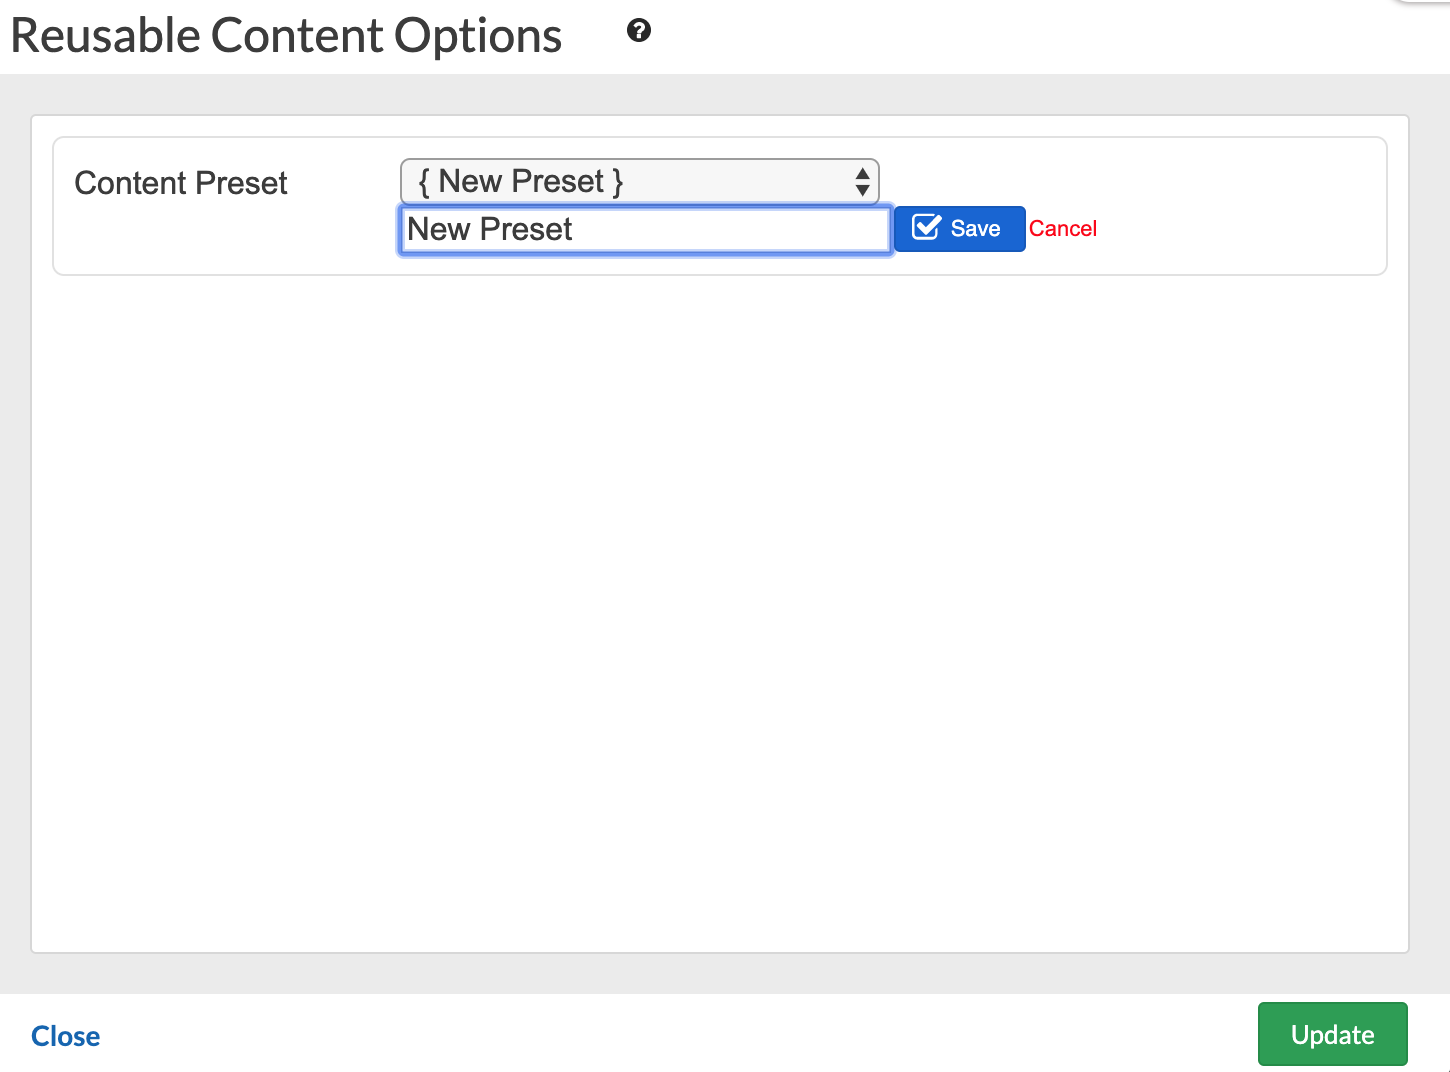
After adding a Reusable Content element on a page, click on the wheel icon to edit the Reusable Content Options:

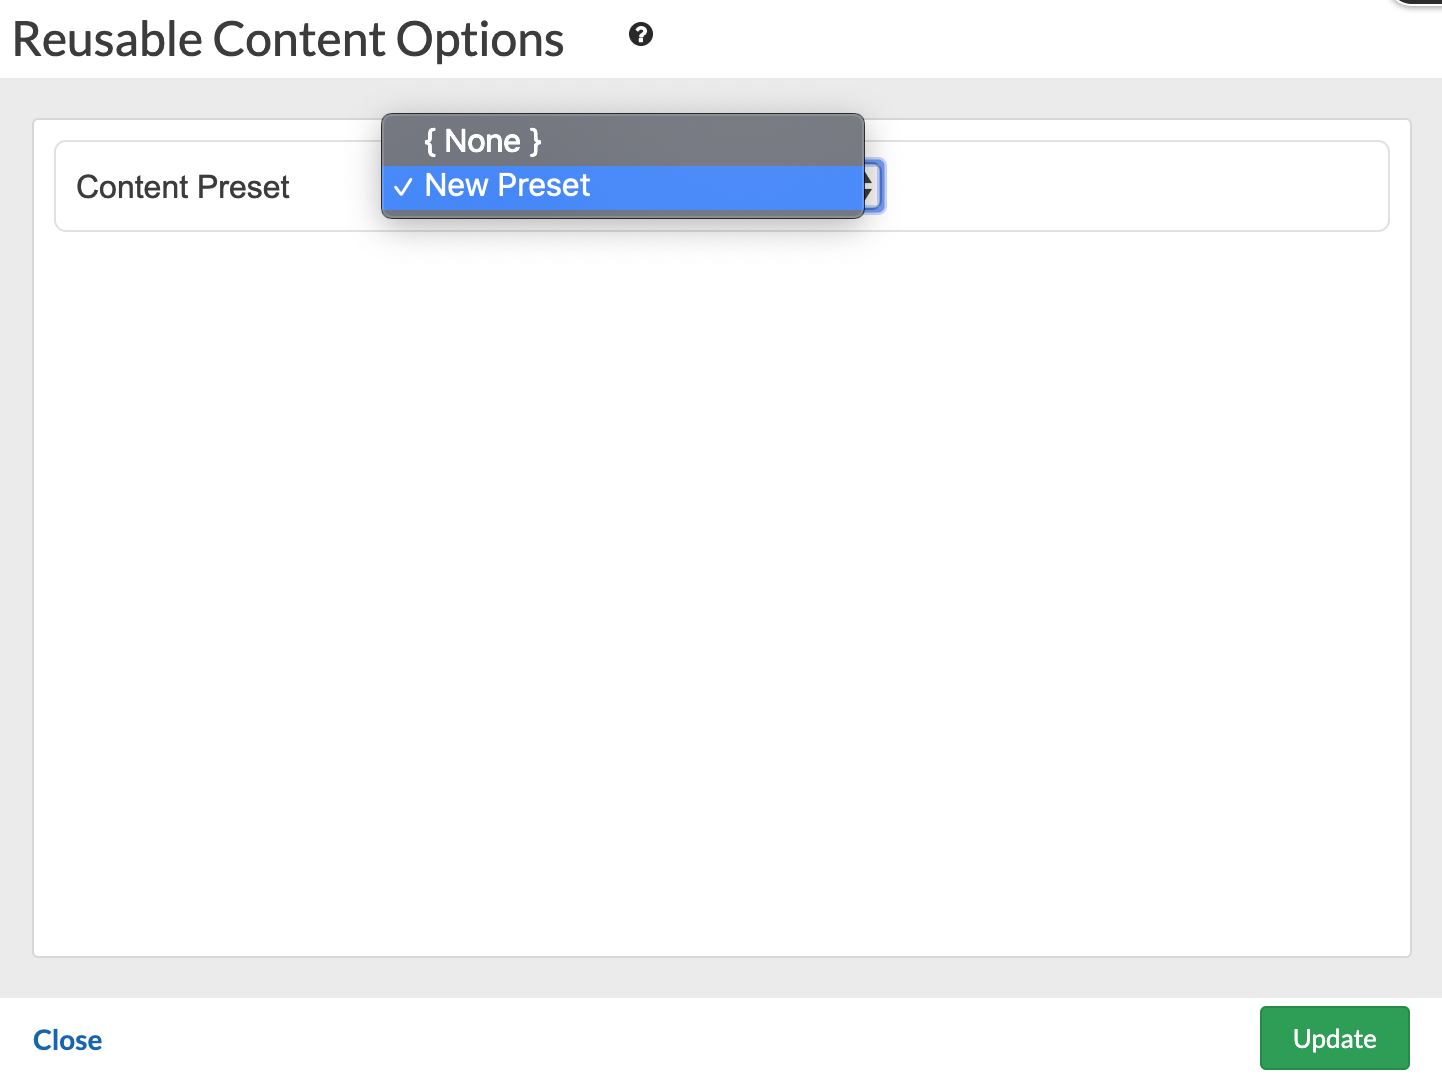
Select { New Preset } and type a unique name. Click Update.
After you add a new reusable content, you will see a container named "Empty Reusable Content - Preset Name".

You can then add any type of content to the empty area, the same way you would add a Text and Image element or an Image Gallery to your page.

Adding content to the reusable content container, will add the content to the selected preset.
Now that you have a reusable content container with some content added, go to another page and again add a Reusable Content from the Elements menu. Choose the desired preset and click Update. The content from the selected preset will be automatically added on the page. Now if you try to edit the content on one page for the selected preset, the content will be automatically updated on all pages that you have the same preset on.
To rename an already added reusable content preset, select it from the dropdown in the Reusable Content Options menu and click Rename.

You can only add the same preset once per page. If the preset is already present on the page, and you try to add a new reusable content element, you will not be able to highlight and select the same preset from the drop-down.