
The Database Editor application allows to create, import, export and store database sheets on your site.
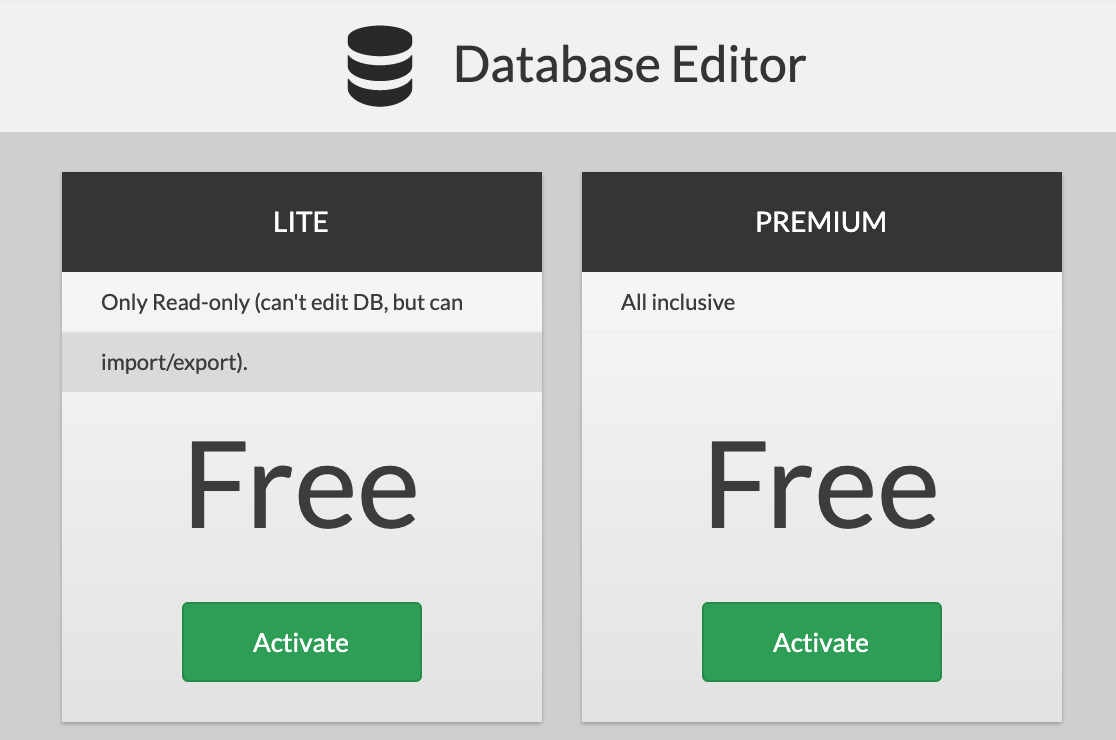
To install the application click Left Menu > Add-Ons > Learn More > Activate. Depending on current plan you can select from Free or Premium version. Free version includes read only mode with options to export import CSV files.
Databases created from applications installed on your site are also stored in the Database Editor. The Form element has an action to 'Send to Database.' The database created by the web form is accessible through the Database Editor. You can import and export CSV documents into the Database Editor.
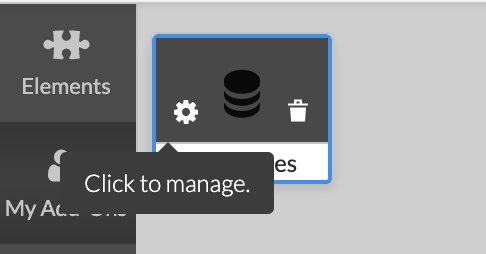
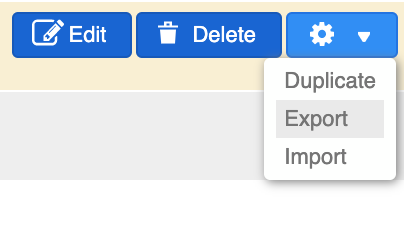
To view all databases on your site go to Left Menu > My Add-Ons, hover over the Databases icon and click on the cogwheel button.
The Databases interface will open, listing all available databases on your site and information for each database - description, number of rows, file size, date created and date modified. Rollover a database to view the options to edit, delete, duplicate, export or import.
To add new database, click on the "Add New Database" button at the bottom of the screen. You can import and export database documents as CSV files. When you choose to export a database from your site, a CSV file will open in a separate window of your browser. Choose to "Save Page as.." to save the document on your computer.


Database Editor
From Left Menu > Application settings > Databases open the list of all databases on your site. Rollover a database and click on the 'Edit' button. The Database Editor will open in a separate window of your browser.
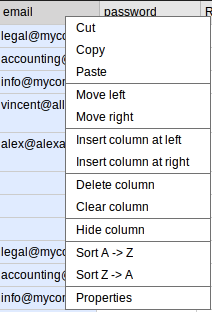
To add a new record to your database, click on the green '+ New Record' button at the top of the Database Editor, double-click on a cell to type inside it, or click on the green + sign at the bottom of the editor. Right-click on a cell allows you to cut, copy, paste or clear cell.
To add a new column, click on the icon 'Add New Column' at the top. The following column types are supported: Text, Number, Dropdown, Multichoice, Combo, Number, Password, Date, Rich Text, File, Float, ID. Column types correspond to the text fields types in a web form, configured to send to database, and to the select field, checkbox field and radio fields. When adding new column to a database connected to a web form, It is important to keep the column type consistent with the type of textfield in the form.
Right-click on the column allows you to cut, copy, paste, to move or insert, delete, clear, sort A-Z or Z-A. Right-click on the column and select 'Properties' to edit its properties and view and edit type.
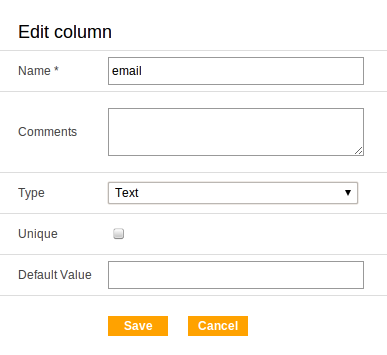

Most columns can be set to unique, meaning data in its cells cannot be doubled. Mandatory columns are marked with an asterisk.
Columns of type File > Preview allow for images to be uploaded in the database, and their width and height is customizable. Columns of type Rich Text open an edit box for typing and inserting rich text.
To access the Database Editor's preferences (customize rows' height and fonts size), select the row header and click the Preferences gear icon.
Note: System error messages appear in red at the bottom of the Editor.