After you login to edit your website, you enter what we call website Admin View. The Admin View looks very similar to your End-user view (i.e what your visitors see when they come to your site). In Admin View, however, there are additional options allowing you to manage any aspect of your site: you may add, edit, delete content, manage applications, access databases and more. All these Admin options are accessible through a Left Menu , Top Admin Menu and many Element menus - one for each content element on the page.
Left Menu
From the Left Menu you may add all types of content - Text and Image, Image Gallery, File Area, Form, HTML Snippet, or Section Group. You can Manage Pages, access Application Settings, edit Site Properties and review your Account settings.
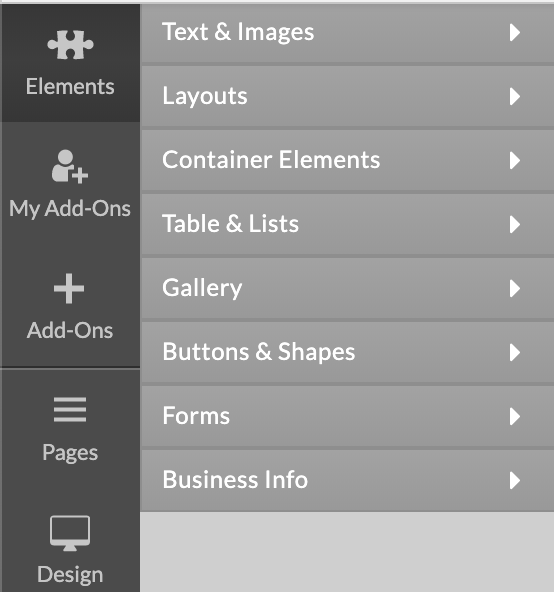
In the Elements section you can find all elements that can be placed on page, e.g. Text and Image, Image Gallery, File Area, Form.
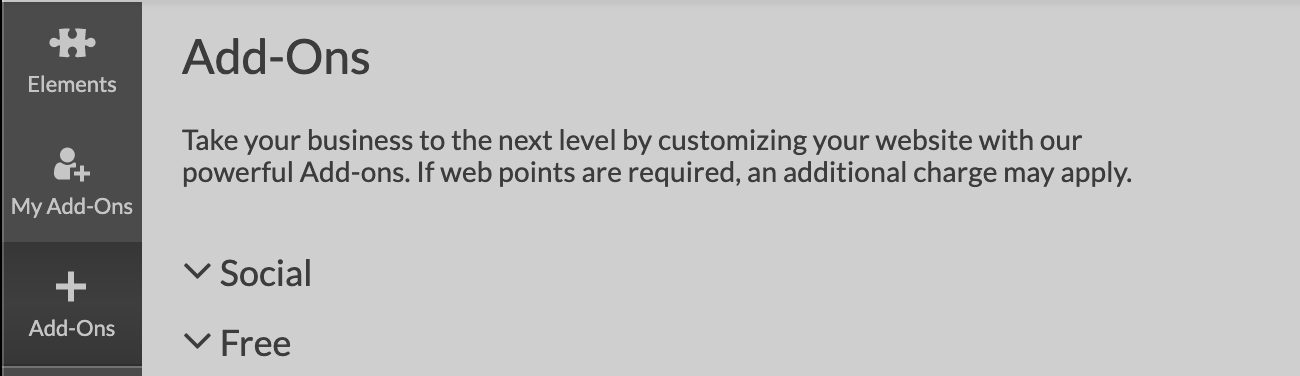
In the Add-Ons section you can find all your installed Applications and you can access your applications catalog where you can install/uninstall available to your package apps.
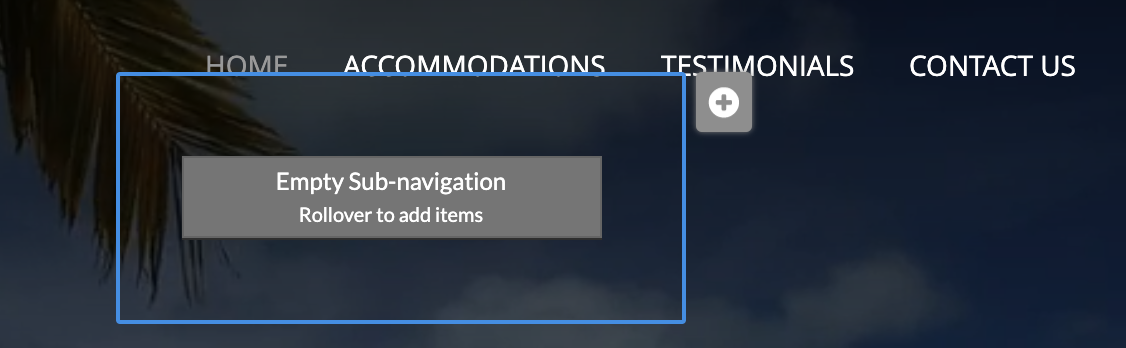
Drag-and-drop the content you wish to add and light blue rectangles will show all possible locations where this content may be added once you hover over the page.
The blue rectangles indicate the locations available on the page. Drop the element to the desired location to add the content there.
Click on Pages to open the management window for your site pages.
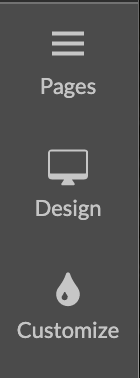

Click on Design to open the stock design gallery where you can select a different template of your current design or choose a different one.
Click on Customize will open the Customize the Site Design menu, where you can change your color scheme, set your own fonts, or upload a background image on demand!
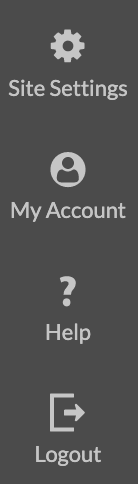
By clicking the Site Settings, you can access options that apply to your site as a whole: enter your custom domain name, add search engine meta data, password-protect the whole site, and more.
In My Account (if available) section you can file all personal information associated with your website account, view the upgrades applied to it, cancel the account billing or delete your website.
The Help (if available) option will list all available online help resources - Tutorials, FAQ, Tips and Tricks and others.
The Logout link at the end will log you out of your website Admin view and will direct you to the website end-user view.
Element Menu
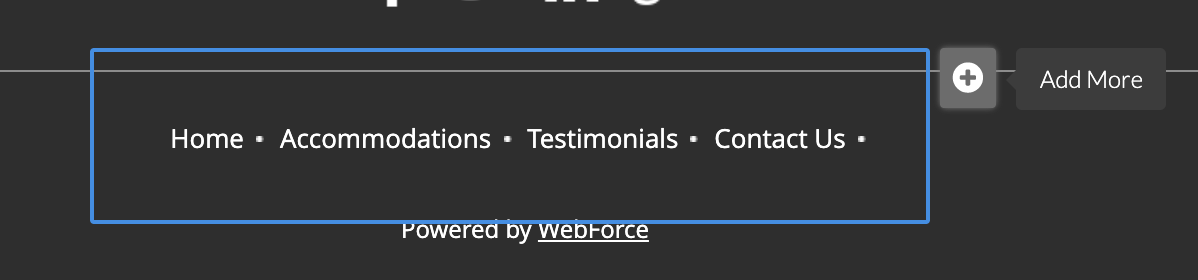
Your website is made up of different content elements - text, image galleries, forms and other. All content elements may be edited by simply rolling them over. A blue rectangle will mark the content you are going to edit and a side menu will show up to the right of the element. Some content elements like empty navigation / subnavigation or HTML snippet may have a gray placeholder showing their location. Just like the other content elements, you may edit and add items to them by simply rolling over the gray placeholder. The editing options available in the side menu are as follows:Clicking the cog-wheel icon will open the element Properties window. There you will be able to Edit the selected content.Clicking the bin icon will Delete the selected content. A Confirmation window will show up before deleting the content.


This icon represents the Copy content function. After clicking on it, the selected content will appear in the Left Menu Clipboard. You can Paste the selected content or Paste All, if more than one content elements were copied, by drag-and-drop the content to the light blue rectangles that will show all possible locations where the content may be added once you hover over the page.
The crossed eye icon represents the Hide content function. Clicking on it will preserve your content in Admin view, but will remove it from End-user view. The hidden content will become faded.
The check-box icon allow you to Select several content elements at once. This will allow you to execute a function - Delete or Copy on multiple elements. A blue rectangle will show up around each selected element.
The plus icon is present in the Side Menu of elements like Navigation Area, Image Gallery, File Area and Sections Groups. It allows you to Add items inside the selected area. For example, clicking the plus icon on a Navigation Area will let you add Navigation Items to it.
In order to move an element to a different location, simply click on it's icon and drag-and-drop the element to the light blue rectangles that will show all possible locations where this content may be moved once you hover over the page. Drop the element to the desired location in order to move it there.

Top Admin Menu
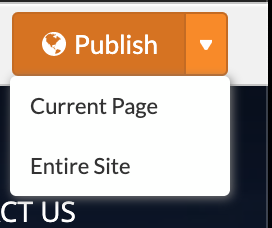
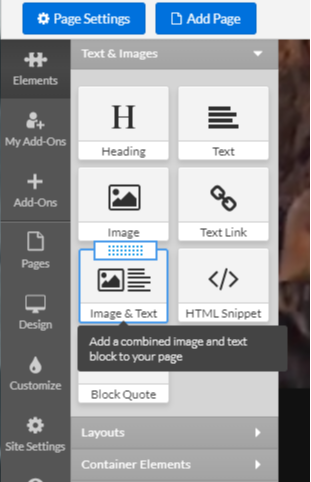
The Top Admin Menu is located at the very top of your website Admin. It holds the options to access the Page Settings, Add Page to your site, Preview how your site looks in End-user view, Activate your account and Publish a page or the entire site.

The Page Settings button opens a properties panel which allows you to split your page in columns and change the page layout or color theme (layout and color theme are available with some designs only).Click the Add Page button opens a properties panel which allows you to define the properties for the new page - page name, header image, URL, etc.
Click the Preview button to check how your page will look in End-user view. While in preview mode, you have the option to continue editing the site by clicking the Edit button and/or Publish the page. A confirmation window will popup before publishing the page.

All website accounts need to be activated within 7 days from signup by clicking the Account not activated button. The account activation ensures that a valid email address is tied to the website you created. At this email address the system will send important notices like that for end of trial, expired subscription and others.
If you click the Publish button, all changes you applied to the Admin view of your page will become available in End-user view as well. As soon as you publish the page, a confirmation notice will appear at the top left with the URL of the published page and a link for sharing the page with other people. Depending on the Advanced Options state, you can either publish only the page or you can publish the entire site. The Publish button will change color from orange to green.